Super Delicious and Quick Recipe for Pakistani Kheer
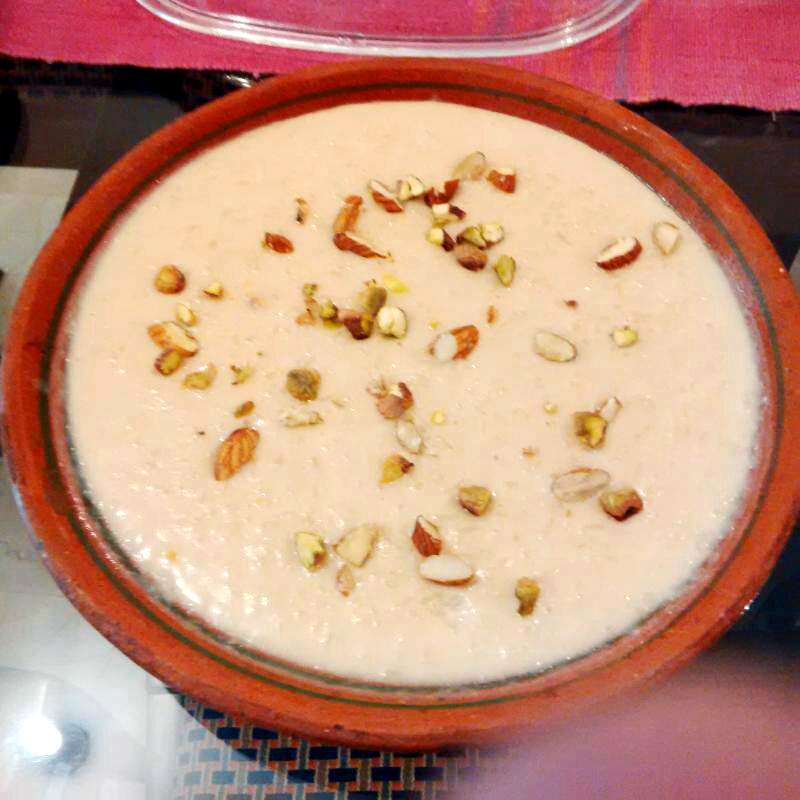
Kheer has always been one of the most enjoyed delicacies of Pakistani cuisine. You can serve your delicious kheer in the adorable cold mini clay pots. We know that Eid is just around the corner, and you are probably struggling to come up with a perfect eid dessert. This year, stay home and recreate this delicacy and surprise your family members by using our step-by-step simple Pakistani Kheer recipe. It will taste better than any other store-bought kheer versions!
Kheer Origination
Whether it was Eid, weddings, or any other occasion, kheer has been a staple in every other household. Kheer is very close to the ‘rice pudding’ because of the similarity in its ingredients; in fact, the first South Asian bowl of kheer consisted of rice, milk, clarified butter, and sugar. The clarified gave the kheer a very creamy and dense texture. Soon kheer gained popularity worldwide and had several other diverse variations to it that differed from country to country.
Are There Other Existing Variations To Kheer?
Though ‘kheer’ originated in the sub-continent and gained its name from there. The Persians were already quite well aware with this delight long before ‘kheer’ existed and had their own version to it. Its other name is ‘Sheer Birinj,’ serviced with honey/jam cold. Afghani’s had a similar dish called Shohla-e-Zard, which has close traits of a traditional kheer recipe. However, it remains incomplete without some key ingredients such as saffron, rose water, cinnamon, dry fruits, and kewra. The essence involved in the Afghani kheer made it more fragrant. China also was quick to jump on the milky rice pudding bandwagon by having their glutinous rice blend referred to as the ‘eight jewel rice pudding.’
Soak the rice in the water two hours prior to when you need to prepare your kheer. The soaking process makes the rice softer, which allows you to easily blend the rice smoothly, resulting in a creamy consistency.
Use a blender, preferably, to blend the rice until you are left with a very fine mixture. You can also use a hand blender, but you must ensure that the hand blender gets the job done just as good and satisfactory as a blender. This smooth movement of the mixture in the blender is why it is important to presoak your rice.
Place a sieve over the top of a bowl and pass the rice mixture through a very fine sieve.
Use a spoon to press the rice against the surface of the sieve, so you extract all the fine bits and particles of the rice and its liquefied form. Use whatsoever you have in the bowl and discard what remains in the sieve (see tips).
In a large deep saucepan over a low simmer, add the milk along with the pods of cardamom and allow the milk mixture to reach a boiling point and let it reduce/evaporate until you are left with approximately 1,500 ml of milk. Discard the cardamom pods at this point if you wish to do so using a spoon or by straining the milk.
Add the fine rice mixture to the milk along with the can of condensed milk.
Make sure that you are stirring this mixture continuously for around 8-10 minutes, be very precautious about your stirring as this is a make or break factor and stage for your kheer to turn out amazing.
After the mixture has thickened and you feel the spoon/spatula is harder to move through the mixture than it was before, you will know your kheer has thickened, and it is ready.
Transfer the kheer to a heatproof dish while it’s still warm and garnish with your choice of assorted dry fruits.
Serve immediately warm or cold.
TIPS:
Blend the rice two to three times, just to ensure that you have a very thin, smooth rice mixture that easily passes through a fine sieve with minimum waste.
If you are looking for a more ‘chunky’ kheer, use just ½ cup of rice and do not blend it, strain the presoaked rice to get rid of excess water, and add it directly to the reduced milk. Cook the rice and milk over medium heat for around 5-8 minutes or until the rice is cooked well. Lastly, coarsely mash the rice with the help of your spoon/spatula or a masher until the mixture looks lumpy and chunky. Follow through the rest of the recipe as instructed above.
Consistently stir the mixture after you’ve added the other ingredients. If you leave it in between, there are chances for the milk to burn.
After you have transferred the kheer to a dish, remember that is the point where you are able to customize your dish according to what best suits your taste buds.
You can choose to top your kheer with dry roasted desiccated coconut, and you’ll end up with coconut kheer. Similarly, using blanched almonds in your kheer would give you an almond-based kheer. Consider using this as a base recipe for you to build up and customize over as per your desire.
You can also set the kheer in small mud pots and then refrigerate it for at least 2-3 hours before serving, for ‘Matka kheer.’